
Why Try Nail Art at Home?
Nail art is a fun way to add personality to your appearance without spending money on a salon appointment every time you want a fresh look. With a few nail polishes, a steady hand, and simple household tools, you can create attractive designs in your own space. You do not need professional training to begin. In fact, many popular nail styles are made from basic dots, lines, colour combinations, and small decorative details that are easy to practise.
Learning nail art at home also gives you complete control over the colours, length, and design you prefer. You can keep your nails simple for work or college, choose brighter shades for a celebration, or try a new pattern whenever you have free time. Beginners should start with uncomplicated designs rather than trying detailed salon-style artwork immediately. A little practice, patience, and proper nail preparation can make even a simple manicure look neat and polished.
What Beginners Need Before Starting
Before you begin, choose a clean, well-lit place where you can rest your hands comfortably. Keep tissues or cotton pads nearby, and place your nail polish bottles on a flat surface so they do not tip over. It is helpful to work on one hand at a time and allow each coat to dry before adding another layer. Rushing is one of the main reasons beginner nail art becomes smudged.
Start with a small collection instead of buying many colours and accessories. A base coat, two or three nail polish shades, a top coat, and a remover are enough for several beginner designs. You can add a dotting tool or a fine brush later if you enjoy the process. Choose products that are in good condition and follow the instructions on their labels. If a product causes itching, redness, swelling, or discomfort, stop using it and remove it safely.
Essential Nail Art Tools and Affordable Alternatives
You can create many designs without owning a professional nail art kit. A toothpick can make tiny dots, while the rounded end of a clean bobby pin can create larger circles. A thin art brush is useful for lines, but a small detail brush designed for nail polish gives you more control. Use tools gently and keep them clean between colours so that the design does not become muddy.
| Tool | What it does | Beginner-friendly alternative |
|---|---|---|
| Base coat | Helps prepare the nail surface | A suitable clear base polish |
| Top coat | Adds shine and helps protect the design | A clear nail polish labelled as a top coat |
| Dotting tool | Creates circles and flower centres | Clean toothpick or rounded bobby pin |
| Fine nail brush | Makes lines and small details | Clean, fine art brush used only for nails |
| Nail file | Shapes the nail edge | A clean emery board |
| Cuticle pusher | Gently moves back softened cuticles | Leave cuticles alone if you are unsure |
| Nail polish remover | Removes old polish | Use a remover appropriate for your polish |
Avoid using sharp objects to make designs or clean around the nail. Never share tools that may have contact with broken skin, and do not use household paint or craft glue as nail products. Products intended for nails are formulated for that purpose, while other materials may irritate or damage the nail area.
How to Prepare Your Nails Properly
Good preparation makes a noticeable difference to the final result. First, remove old nail polish and wash your hands with soap and water. Dry your hands thoroughly, including the skin around and underneath the nails. If your nails are uneven, gently file them in one direction to create a shape you like. Square, round, and soft oval shapes are all suitable for beginner nail art.
Do not cut or aggressively push back your cuticles. Cuticles help protect the area where the nail grows, and cutting them can lead to irritation or infection. If you have dry skin around your nails, apply a little hand cream, but avoid leaving an oily layer on the nail plate before polishing. Wipe the nail surface gently if needed, then apply a thin base coat and allow it to dry according to the product instructions.
Choosing Nail Polish Colours That Work Together
Colour selection can make a basic design look coordinated. If you are new to nail art, begin with two shades that complement each other. White and pink create a soft appearance, while nude and brown look understated. Black and white provide strong contrast, and pastel shades work well for delicate patterns. You can also use one colour for most nails and reserve a brighter shade for a single accent nail.
Think about where you plan to wear the design. Neutral shades, soft pink, beige, muted mauve, and light brown can suit everyday outfits and many office settings. Brighter colours, metallic accents, and glitter may be more suitable for parties or special occasions. There is no strict rule that you must follow a particular colour trend. Choose shades that make you feel comfortable and that work with your wardrobe.
Easy Nail Art Design 1: Classic Dots
Dot nail art is one of the easiest designs for beginners because it requires very little precision. Apply a base colour and let it dry completely. Dip the rounded end of a clean toothpick or dotting tool into a second polish colour, then gently touch it to the nail to create a dot. Repeat the dots in a straight line, a diagonal pattern, or around the nail edge.
For a simple look, make one small dot near the base of each nail. For a playful pattern, create several dots in different sizes. Wipe the tool before changing colours, and avoid picking up too much polish because thick dots take longer to dry. Finish with a top coat once the design is completely dry. This style works on both short and long nails and can be adapted to almost any colour combination.
Easy Nail Art Design 2: Minimalist Lines
Minimalist lines look modern and are easier to create than complicated illustrations. Start with a neutral base shade such as nude, pale pink, or cream. Once it is dry, use a fine nail brush to draw one thin vertical line, a diagonal stripe, or a small curved line. You can place the line in the centre of the nail or near one side for an understated effect.
If your hand shakes, rest your wrist on the table and move the brush slowly. It is better to make one clean line than several rushed ones. You can also practise the movement on paper before applying polish to your nails. Keep the design simple, especially on short nails, where a single detail can look more balanced than a crowded pattern.
Easy Nail Art Design 3: French Tips
A French manicure is a classic option that looks neat with casual and formal outfits. Apply a sheer pink, beige, or clear base colour and let it dry. Then use a white polish to create a narrow line along the free edge of each nail. Beginners can make the line thinner rather than trying to create a wide, perfectly curved tip.
If drawing a smooth curve is difficult, use a French-tip guide sticker designed for nails. Place it only after the base colour is fully dry, press it down gently, and paint the exposed tip. Remove the guide carefully before the polish becomes too dry or stringy, following the guide's instructions. Finish with a clear top coat after the design has dried. You can also try coloured tips in pastel, red, or deep brown shades.
Easy Nail Art Design 4: Simple Flowers
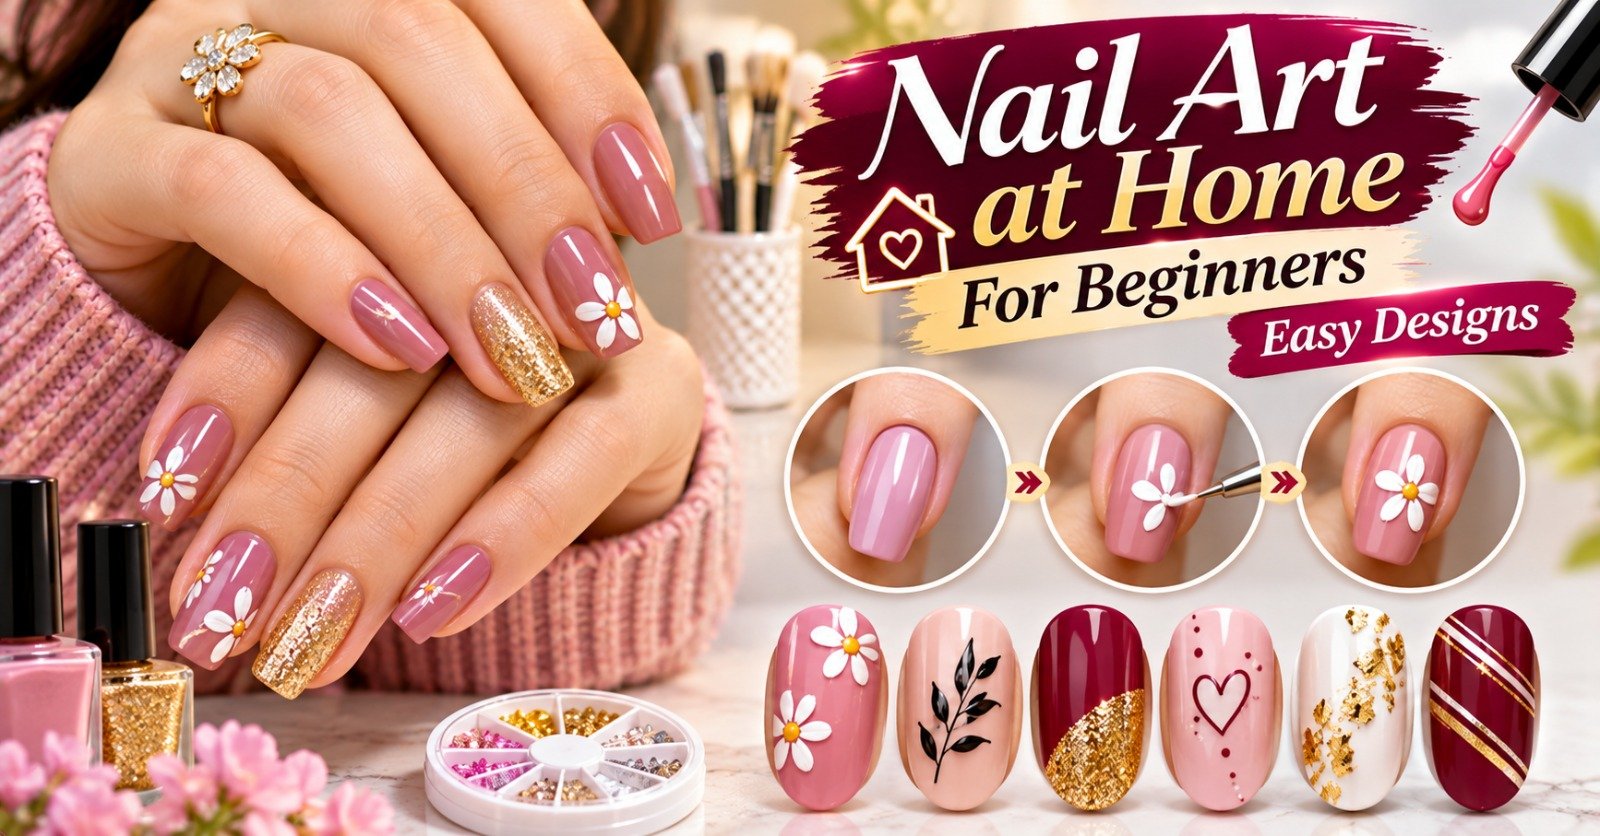
Tiny flowers are a charming choice for spring, summer, or a soft everyday manicure. Paint the nails with a light base colour and allow it to dry. Use a dotting tool to place five small dots in a circle, leaving a little space in the middle. Add a contrasting dot at the centre to complete the flower. You can create one flower on each ring finger or add a small flower to every nail.
White petals with a yellow centre look fresh, while pink petals on a nude base create a gentle design. Keep the dots small so the flower does not cover the entire nail. If the petals look uneven, do not worry; small variations can make a handmade design look charming. Allow the artwork to dry completely before applying top coat with light strokes.
Easy Nail Art Design 5: Two-Tone Colour Blocking
Colour blocking uses two or more solid shades in simple sections. It is a useful design for beginners because the shapes do not need to be perfectly detailed. Apply a base colour and let it dry. Use nail striping tape or a nail guide to divide the nail into two sections, then paint the exposed area with a second colour. Remove the tape carefully as directed by the product instructions.
You can make a diagonal split, a vertical half-and-half design, or a coloured tip. For a balanced result, pair a neutral shade with one stronger colour. Make sure the first layer is fully dry before applying tape, or the tape may lift the polish. If you do not have striping tape, create a simple two-colour look on separate nails instead of trying a complicated division.
Easy Nail Art Design 6: Glitter Accent Nail
A glitter accent nail adds sparkle without requiring detailed painting. Choose one nail, often the ring finger, and apply a base colour to all nails. On the accent nail, apply a thin layer of glitter polish. Depending on the coverage, you may need a second thin coat after the first has dried. Keep the other nails plain or add a small matching detail.
Glitter polish can sometimes feel textured, so a suitable top coat may help create a smoother finish. Do not scrape glitter off with sharp objects when removing it. Follow the remover's instructions and use gentle removal methods. If you prefer a subtle style, choose fine shimmer rather than large glitter pieces. This design is easy to customise for celebrations, weddings, festivals, or a weekend outing.
Easy Nail Art Design 7: Heart Nail Art
Small hearts look sweet and can be created with two dots and a little shaping. Apply a pale or neutral base colour and allow it to dry. Place two small dots close together using red, pink, or another contrasting polish. Use a fine brush or toothpick to gently pull the lower part of each dot into a point, forming a heart shape. Practise on paper first if you are unsure about the movement.
A single heart on the ring finger gives a simple result, while tiny hearts near the tips create a more playful style. Do not overload the tool with polish because the shape can spread. Work slowly and let the design dry before sealing it with a top coat. Hearts can be adapted to different seasons and occasions by changing the colour and size.
Easy Nail Art Design 8: Easy Ombre Effect
Ombre nails blend two colours gradually rather than keeping them in separate blocks. This design takes a little more practice, but beginners can create a soft effect using a small makeup sponge. Apply a base colour and let it dry. Place two polish shades next to each other on a washable surface, allowing their edges to touch slightly. Dab a makeup sponge lightly over the colours, then gently press it onto the nail.
You may need to repeat the dabbing process with thin layers to build the gradient. Protect the skin around the nail with a peel-off barrier made for nail art, if you have one, or clean stray polish carefully after it dries. Do not press too hard, as this can create a thick, uneven layer. Finish with top coat once the gradient is dry. A pale pink fading into white is a popular beginner combination.
Nail Art Ideas for Short Nails
Short nails are ideal for simple, neat designs. You do not need long extensions to enjoy nail art. Tiny dots, thin French tips, small flowers, single hearts, and one accent stripe can all look attractive on a shorter nail plate. Keeping the design small helps the nail look balanced and prevents the artwork from feeling crowded.
Light and medium shades can create a clean everyday appearance, while darker colours can make a short manicure look bold. If you want a visual lengthening effect, try a narrow vertical line or a slim French tip rather than a thick horizontal band. File the nails into a soft round or squoval shape if that suits your natural nail edges. Most importantly, choose a design that feels comfortable for typing, cooking, studying, and daily tasks.
Simple Nail Art for Work, College, and Everyday Wear
For work or college, choose designs that are easy to maintain and do not interfere with daily activities. A sheer nude base with one tiny dot, a soft pink manicure with a single glitter accent, or a fine white French tip can look polished without being too bright. If your workplace has a dress code, follow its rules and select a style that fits the environment.
For everyday wear, consider neutral colour blocking, small floral details, or a single line on each nail. You can match the polish to your outfit, but it is not necessary to coordinate every detail. A simple manicure can look intentional when the nail edges are clean and the polish is applied evenly. Keep nail length practical for your routine and avoid raised decorations if they catch on clothing or make everyday tasks difficult.
How to Make Nail Art Last Longer
The best way to help nail art last is to prepare the nail surface and apply polish in thin layers. Thick coats may take longer to dry and can dent or peel more easily. Start with a base coat, apply one or two thin coats of colour, add the design, and finish with a compatible top coat. Allow each layer to dry as directed by the product label rather than assuming it is ready after a few seconds.
Try to avoid long exposure to hot water immediately after painting your nails. Wear protective gloves when washing dishes or using cleaning products, and do not use your nails as tools to open cans or scrape surfaces. If the top coat is designed for reapplication, follow its directions. Keep hands moisturised, but avoid applying oily products directly over fresh polish. Nail polish wear varies depending on the product, nail condition, and daily activities.
Common Beginner Mistakes and How to Avoid Them
One common mistake is applying polish too thickly. Thick layers can remain soft underneath even when the surface feels dry, making dents and smudges more likely. Use thin coats and wait between layers. Another mistake is trying a complicated design before learning basic control. Begin with dots, lines, and accent nails, then move to flowers, gradients, or more detailed patterns as your confidence improves.
Beginners also sometimes skip base coat or apply top coat before the design has dried. Both choices can affect the final result. A base coat helps prepare the nail, while a top coat is best applied when the artwork is dry enough not to drag. Avoid repeatedly brushing over the same wet area because this can create streaks. If a design goes wrong, let it dry and correct the small area rather than immediately adding more polish everywhere.
Nail Hygiene and Polish Removal
Clean tools and careful product use are important parts of nail care. Wash reusable tools after use and allow them to dry fully. Do not share nail tools if they may have touched broken skin, and avoid using tools that are rusty, damaged, or difficult to clean. Never apply polish over a nail that appears infected, painful, or unusually discoloured; seek advice from a qualified healthcare professional if you are concerned.
When removing polish, use a remover according to its label and avoid harsh scraping or peeling. Repeatedly picking off polish can damage the surface layers of the nail. After removal, wash your hands and apply moisturiser to your hands and the skin around your nails. Give your nails a break from polish if they feel dry or brittle. If you experience a reaction to a nail product, stop using it and seek medical advice if symptoms persist or become severe.
Conclusion
Creating nail art at home for beginners does not require expensive equipment or professional salon skills. Start with a few reliable nail products and practise easy designs such as dots, lines, French tips, flowers, hearts, and glitter accents. Preparing your nails properly, choosing colours that work together, and applying thin layers can help your manicure look cleaner and last longer. You can also adapt nearly every design for short nails, everyday outfits, college, or office wear.
The most important part is to enjoy the process and improve gradually. Your first attempt may not look exactly like the inspiration picture, and that is completely normal. Try one simple design at a time, keep your tools clean, and give your nails gentle care between manicures. With regular practice, you can create attractive DIY nail art at home and enjoy a fresh look without booking a salon appointment.
Frequently Asked Questions
What is the easiest nail art design for beginners?
Classic dots are among the easiest designs because they need only a base colour and a simple dotting tool or clean toothpick. You can place one dot on each nail or create a small dotted pattern. Minimalist lines and glitter accent nails are also beginner-friendly options.
Can I do nail art at home without professional tools?
Yes. Many basic designs can be made with regular nail polish, a clean toothpick, a bobby pin, and a fine brush. Professional tools can improve control, but they are not essential for dots, simple lines, or basic colour combinations. Use only clean tools and avoid sharp objects.
Which nail art is best for short nails?
Small dots, thin French tips, tiny flowers, vertical lines, and single accent details work well on short nails. Avoid overcrowding the nail with too many large patterns. A clean shape and evenly applied polish can make a short manicure look neat.
How can I make my nail art last longer?
Prepare clean, dry nails, apply a base coat, and use thin layers of polish. Allow each layer to dry before adding the next, then finish with a suitable top coat. Wear gloves for cleaning and dishwashing, and avoid using your nails to open or scrape objects.
How long should I wait for nail polish to dry?
Drying time depends on the formula, the thickness of each coat, room conditions, and the number of layers. Follow the product label and allow extra time between coats. Even when polish feels dry on the surface, it may still be soft underneath, so handle objects carefully until it has fully set.